
Seller Portal
A shared workspace where the seller uploads the documents you've requested, reads the reports you've shared, and chats with you — without losing the thread across email and SMS.
What the Seller Portal is
The Seller Portal is a private workspace for you and the seller. It lives on the case alongside your Case Rooms but only the seller can see it. It does three jobs:
- request and collect the documents you need from the seller,
- share progress reports with the seller as the case develops,
- chat with the seller directly inside Propstreet, instead of scattering the thread across email and SMS.
The seller never sees your prospect list, the investors you've contacted, the bids you've received, or any of your internal notes. They see only what you put in the Seller Portal.
Every case can have one Seller Portal. You can invite multiple sellers to share access to it — typically two co-owners, or an owner and a representative — and you can revoke access at any time.
Invite the seller
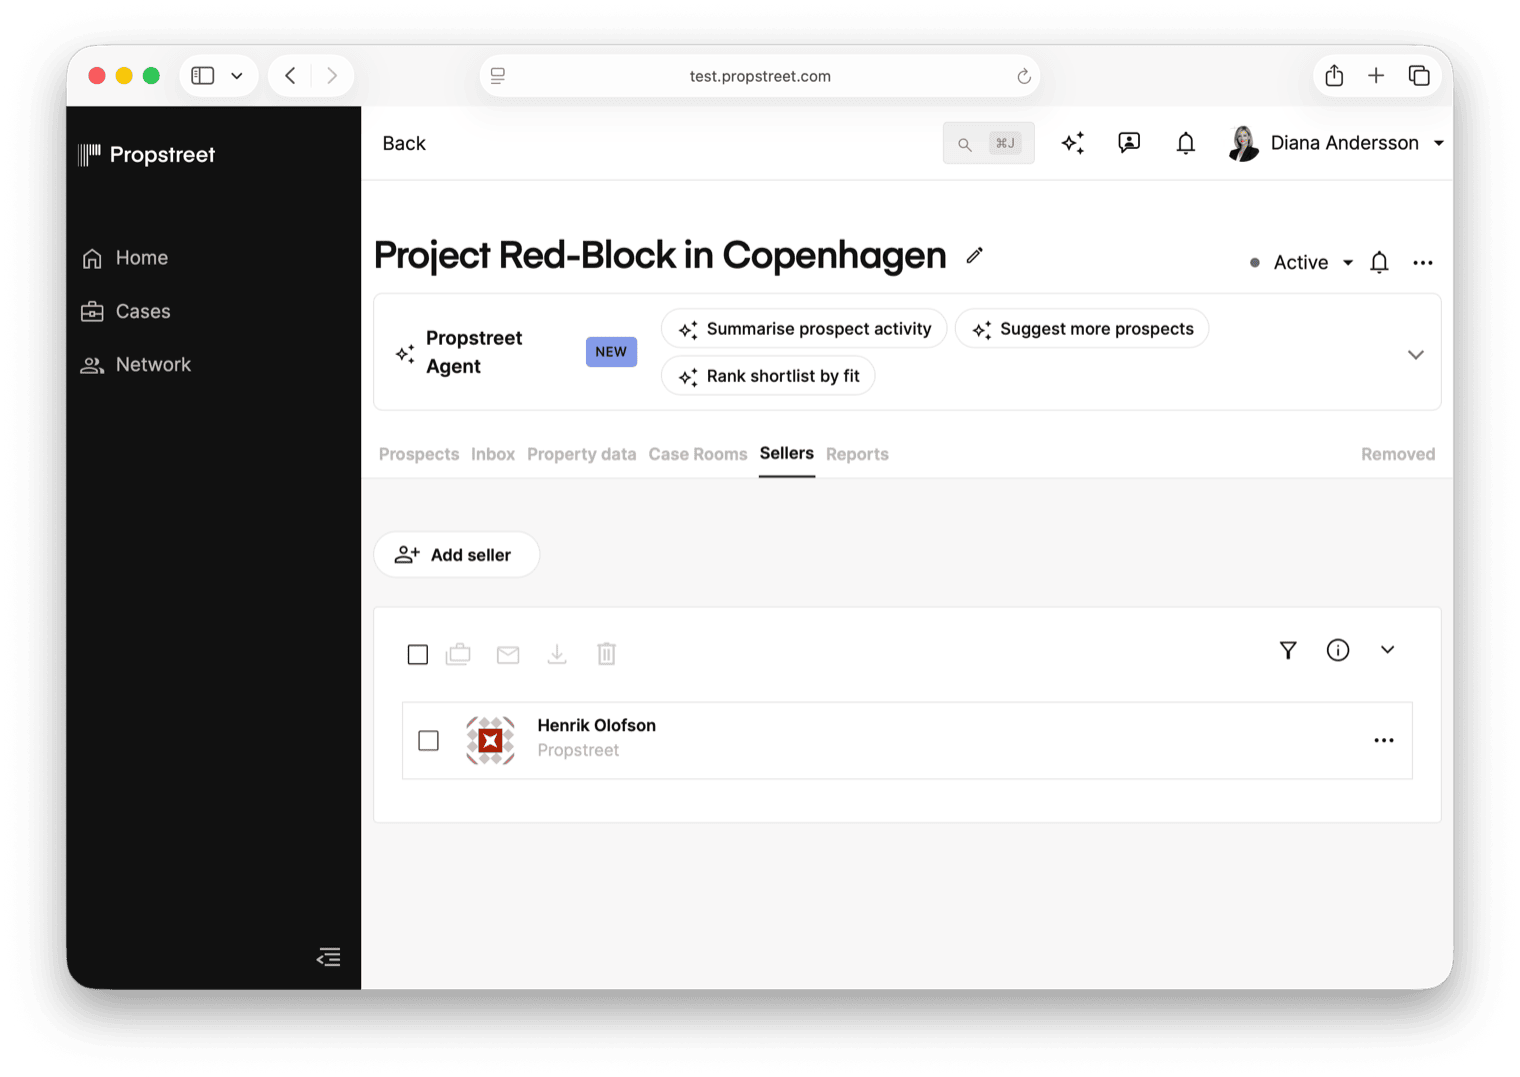
Open the case and click the Sellers tab. On a new case the tab is empty and reads "Stop chasing the seller over email — Invite the seller to a private Seller Portal to collect documents, share reports and keep them in the loop as prospects engage. Click 'Add seller' to start."
Click Add seller. A contact picker opens; pick an existing contact or create a new one with the seller's email. The seller doesn't need a Propstreet account yet — Propstreet creates one for them when they accept the invitation.
Create the Seller Portal
If the case doesn't have a Seller Portal yet, the Sellers tab prompts you to create one. Click New Seller Portal and confirm the room type — the dialog explains "Choose the room type. Use a Case Room for Prospects and a Seller Portal for private collaboration with the seller."
The room is created with a layout the seller can use straight away: a place for Requested documents, a folder structure for Files, a section for Shared reports and a Chat with you. You can add more sections later if the case needs them.
You only get one Seller Portal per case. If you try to create a second one, the dialog tells you "This case already has an active Seller Portal — only one is allowed per case."
Send the invitation
Back on the Sellers tab, hit Invite to Seller Portal on the seller's row. A Send invitations dialog appears, pre-filled with the message "You've been invited to the workspace for [case name]".
The seller receives an email with a signed link. Clicking it logs them straight into Propstreet — they don't choose a password. The seller lands on the Seller Portal you just created.
If the invitation hasn't been accepted yet, the Sellers tab shows status Pending. You can re-send the invitation from the same row.
Request the documents you need
In the Seller Portal's Files section, click Request document. A modal opens with three fields:
- Document name — required, up to 200 characters. Examples: Energy declaration, Rent roll, Title deed, Floor plans.
- Instructions (optional) — up to 2 000 characters. Use this to tell the seller exactly which version or file format you need. The helper text reads "Optional notes for the seller — e.g. which version or file format you need."
- Required from seller — a checkbox, ticked by default. When ticked, the document is flagged as a must-have in the seller's list; when unticked, it shows as nice-to-have.
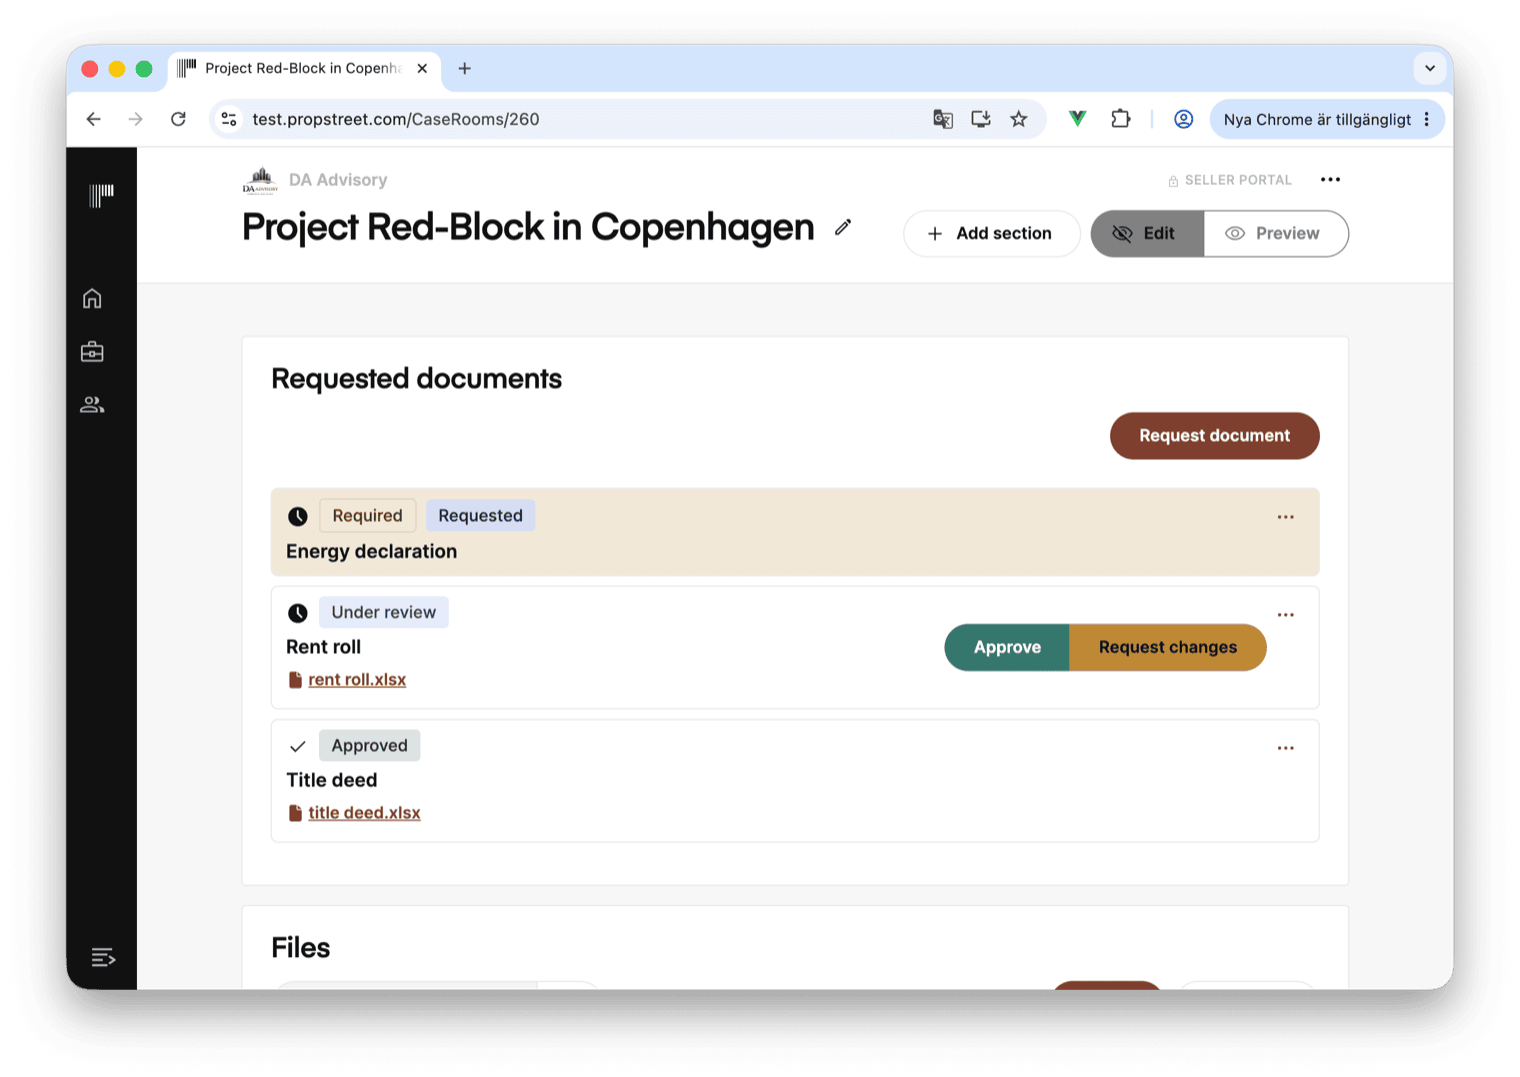
Save and the request appears in the Requested documents card. Each request has a status:
| Status | Description |
|---|---|
| Requested | You're waiting on the seller. |
| Under review | The seller has uploaded a file; it's your turn to approve or send back for changes. |
| Approved | You've signed off on the upload. |
| Needs changes | You've rejected it with a comment, and the seller can re-upload. |
You can edit a request title or change its required flag at any time from the row menu. Deleting a request unlinks the uploaded file but doesn't delete the file itself — it stays in the folder.
What the seller sees
The seller's view is a simpler version of the broker view. From the top:
- A broker identity bar with your firm's logo and name, so the seller knows whose workspace this is.
- A next-step pill — a single, prominent prompt that tells the seller the one thing they should do next. If there's an outstanding required document, the pill reads "Next step: upload [document name]" with an Upload now button. If there are unread chat messages instead, it reads "You have N unread messages" with an Open chat button. The pill hides itself when there's nothing for the seller to act on, so the seller knows the workspace is up to date when it's empty.
- A Requested documents card with each request: title, your optional instructions, a status pill (Requested / Under review / Approved / Needs changes), and an Upload or Replace file button.
- A Shared reports card showing every report you've shared, most recent first.
- A Chat with you (the broker), reachable from the side panel.
- Any sections you've added to the Seller Portal — pictures, key metrics, a map, a summary, files and any other blocks you've laid out on the page. The seller sees exactly what you've put there, in the order you've arranged it.
The seller cannot see your Prospects tab, your Inbox, your other cases, or anything you haven't explicitly put in the Seller Portal. They cannot see other sellers either — if you invite a second seller, each sees the same shared workspace but neither sees your private notes elsewhere on the case.
Approve, request changes, or replace
When the seller uploads a file against a request, the request status flips to Under review and the file appears in the row. From your side of the portal:
- Approve marks the request as Approved. The seller sees a green checkmark.
- Request changes… opens a small dialog where you can leave an optional comment — for example "Wrong period — we need Q1 2026 not Q1 2025". The status flips to Needs changes and the seller sees your comment with an Upload button to try again.
- Replace file lets the seller swap in a newer version of an uploaded file before you've approved it.
There's no Reopen action: once a request is Approved, it stays approved. If you need to re-collect a document, create a new request.
Share a report with the seller
Reports your Agent generates — market summaries, prospect progress, bidding rounds — are normally private to you. To send a report to the seller, open it from the Agent's reports panel and choose Share with seller. The report appears immediately in the seller's Shared reports card and the seller is notified.
Reports are read-only on the seller's side. The seller can read them and ask follow-up questions in the chat, but they can't edit, comment on or delete them.
Re-read the report before you share it. Anything in it lands in front of the seller exactly as written, including caveats the Agent flagged in the analysis. You can unshare it later, but you can't unshare the impression.
What stays private
The Seller Portal is built on a strict allow-list — the seller sees only what you put there. Five things they never see:
- The Prospects list or any investor identity, bid amount or status.
- Other Case Rooms on the case.
- Your Inbox or any email thread with prospects.
- Your internal notes or private memos.
- Activity from your colleagues unless you've shared it.
Conversely, prospects never see the Seller Portal. The two sides of a deal live in separate rooms by design.
- Open the case and click the Sellers tab to invite a seller
- Click New Seller Portal and Invite to Seller Portal to give the seller a private workspace
- Use Request document to collect what you need; approve or send back each upload from the same panel
- Use Share with seller to send a report to the seller
- The seller never sees prospects, bids or internal notes — only what you put in the portal
Make your first document request before you send the invitation. The first thing the seller sees is the next-step pill — "upload the rent roll" reads as a deal in motion; an empty portal reads as the wrong link.